How to Build an Approval Workflow in Notion From Scratch

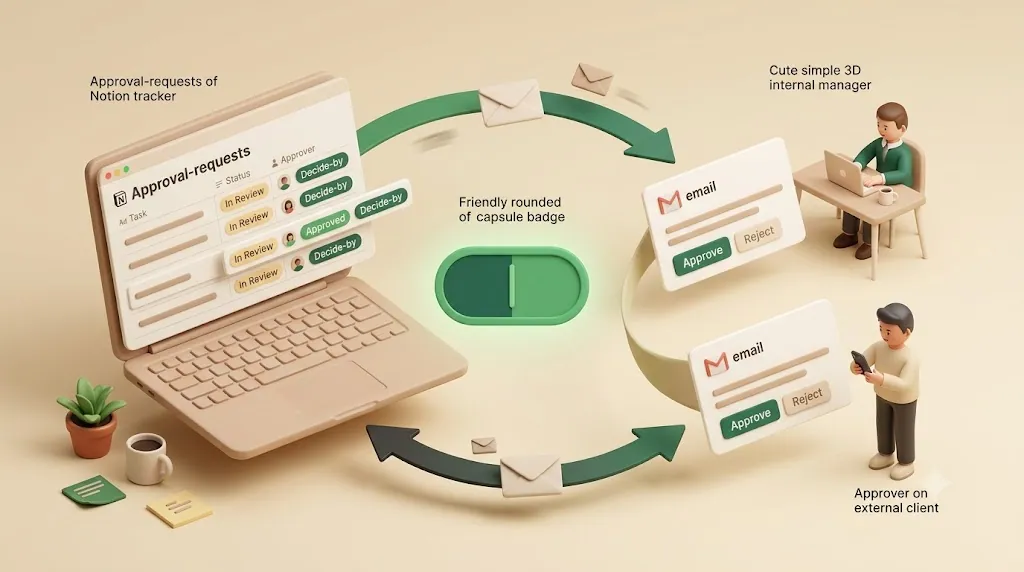
An approval request in Notion rarely fails because nobody made a decision — it fails because there's no way to tell whether it's still waiting, who's sitting on it, or if it was ever actually approved, so someone ends up DMing "did you approve this?" three days later. This guide is for anyone replacing that ad-hoc checkbox-on-a-task-list setup with a real approval workflow, and it walks through building one from scratch: a dedicated request database, a small set of Status stages, buttons for the human decision, and automations that move records between stages so nobody edits properties by hand. Get those four right and Notion runs approvals well for internal teams. The one place native Notion stops is the approver who never opens Notion.
TL;DR
- A dedicated approval database beats a checkbox bolted onto a task list — every request needs a requester, an approver, and a decide-by date of its own.
- Keep Status to 5–8 stages with explicit entry/exit rules (Draft → Submitted → In Review → Approved / Rejected / Changes Requested). More stages is not more control; it is status bloat.
- Approve/Reject buttons stamp three things in one click: the Status, the decision date (
Now), and the person who clicked (the decider).- Database automations move stages on their own when a trigger fires, so records advance without manual edits.
- Multi-stage sign-off is one repeatable pattern (an Approval-stage property that advances Legal → Finance → Exec), not a rebuild per chain.
- Reminder cadence and overdue escalation are intentionally out of scope here — that is a separate build, covered in Notion approval reminders.
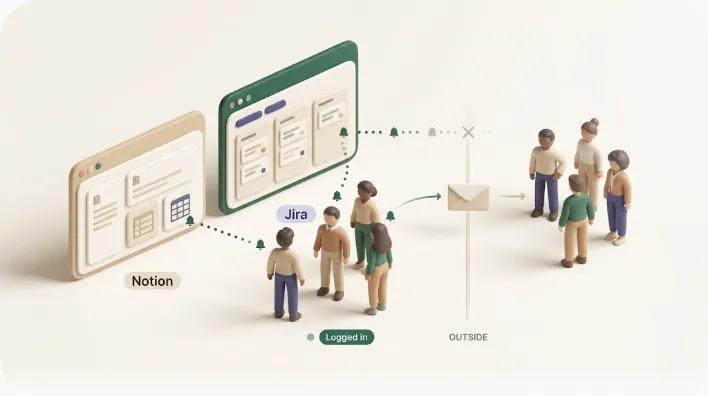
- The real limit: buttons and automations only work if the approver opens the Notion page. Clients, vendors, and guests usually don't.
What you're building — the four moving parts

An approval workflow is not one feature in Notion; it is four pieces working together. Understanding the division of labor before you build prevents the most common mistake: overloading Status to do a job that automations should do.
| Part | Job | Mechanism |
|---|---|---|
| Request database | Holds one row per thing needing a decision | Notion database |
| Status stages | Names where each request is in its lifecycle | Status or Select property |
| Buttons | Capture the human decision in the moment | Button property + actions |
| Automations | Move stages and tag people when conditions are met | Database automations |
💡 Rule of thumb: buttons are for decisions a person makes; automations are for consequences that should follow automatically. If you find yourself asking a human to click something predictable every time, that is an automation, not a button.
Step 1 — Design the approval-request database
Core fields
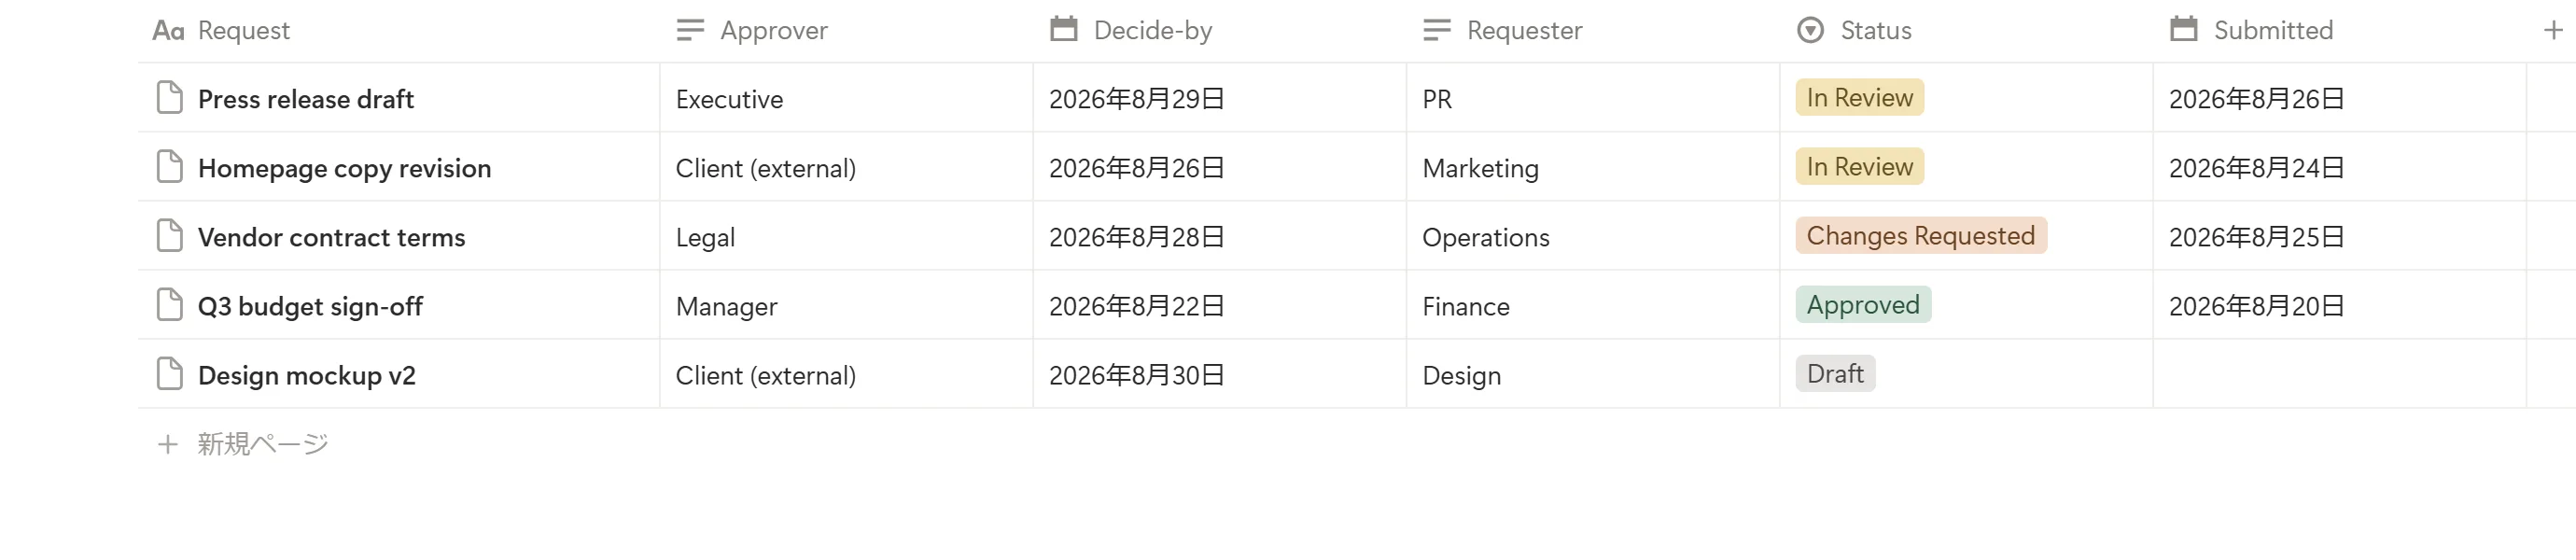
Start a new database where one row = one approval request. The schema below covers the vast majority of approval use cases, from HR leave to creative sign-off to a CRM status change.
| Field | Type | Purpose |
|---|---|---|
| Item / Title | Title | What is being approved |
| Requester | Person | Who submitted it |
| Approver | Person | Who must decide |
| Status | Status | Where it is in the lifecycle |
| Submitted date | Date | When it entered the queue |
| Decision / decide-by date | Date | When a decision was made (or is due) |
| Link to item under review | Relation / URL | The doc, contract, or record itself |
The Link to item under review field is the one people skip and later regret. An approval row should point at the artifact — a page in a Docs database, a CRM record, a leave request — not try to contain it. That relation is also what lets a button on the approval row read or write the underlying item later.
💡 If you are new to building databases, get the schema basics down first in the Notion database guide, then come back to wire up the approval-specific fields.
One database vs. two — when to add a separate 'Approval Steps' log
For a single-approver flow, one flat database is enough. You add a second database — an Approval Steps log — when a request passes through several people and you need the record of every decision, not just the final state.
| Pattern | Use when | Structure |
|---|---|---|
| One database | Single approver, or you only need the final outcome | Requests database, decision stamped on the row |
| Two databases | Multi-stage chains; you need a per-stage audit trail | Requests database + Approval Steps database (one row per stage decision), linked by relation |
In the two-database pattern, the Requests database holds the thing being approved and its current overall status; the Approval Steps database holds one row for each stage's decision (who, what, when), so a fully approved request has three or four step-rows behind it. More on wiring this in Step 6. Deciding this up front means the audit trail is designed in from day one, instead of getting bolted on after an auditor first asks who signed off and when.
Step 2 — Define your Status stages
A working taxonomy
Most approval workflows fit into five to eight stages. A dependable default:
Draft → Submitted → In Review → Approved
                              ├→ Rejected
                              └→ Changes Requested → (back to Submitted)
| Stage | Meaning |
|---|---|
| Draft | Requester is still preparing; not in anyone's queue |
| Submitted / In Review | Handed to the approver; awaiting a decision |
| Approved | Terminal — decision is yes |
| Rejected | Terminal — decision is no |
| Changes Requested | Sent back to the requester; loops to Submitted |
Notion's Status property groups values into To-do, In progress, and Complete, which maps cleanly onto approvals: Draft is To-do, Submitted/In Review is In progress, Approved/Rejected are Complete.
Entry/exit criteria for every stage (and why status bloat kills the workflow)
Every stage needs an explicit entry condition (what puts a request here) and an exit condition (what moves it out). Undefined transitions are where workflows silently break.
| Stage | Enters when | Exits when |
|---|---|---|
| Draft | Row created | Requester submits |
| Submitted / In Review | Requester submits | Approver clicks Approve/Reject/Changes |
| Changes Requested | Approver requests edits | Requester re-submits |
| Approved / Rejected | Approver decides | — (terminal) |
⚠️ Status bloat is the most common failure. Stages like "Pending manager", "Pending finance", "Almost approved", and "Waiting on legal" feel precise but bury the real state and make automations brittle. Keep the lifecycle to 5–8 stages and represent who is up next in a separate property (see multi-stage, Step 5) — not as more Status values.
Step 3 — Add Approve and Reject Buttons
How to create a database button
Notion's Button property runs one or more actions when clicked. To add one:
- Open the database and click the slider icon (Properties) in the top-right of the table, then choose Edit properties to open the full properties panel.
- Choose New property → select Button.
- Label it clearly —
Approve,Reject,Request Changes. - Click Edit automation (the button's action editor).
- Add action(s) — the steps below define what the click does.
- Repeat for each decision you want as a one-click action.
Once these are wired up, deciding becomes a single click instead of a round of Slack messages and status-update reminders.
What the button should actually change
A well-configured Approve button does four things in a single click. This is the piece that turns a button from a toy into an audit-grade decision capture:
| Action | Effect |
|---|---|
| Edit property → Status | Set Status to Approved (or Rejected) |
| Edit property → Decision date | Stamp the date property with Now |
| Edit property → Decided by | Record "Person who clicked the button" as the decider |
| Send notification | Notify the requester that a decision landed |
💡 The "Person who clicked the button" value is the key to a trustworthy log: it records who actually decided, not who was assigned. Paired with a
Nowtimestamp, one click produces a defensible "approved by X at Y" record with zero manual entry.
Buttons vs. database automations — when a human should click vs. when a rule should fire
These are two distinct mechanisms, and mixing them up is why some workflows feel clunky.
| Button | Database automation | |
|---|---|---|
| Trigger | A human clicks | A condition is met (page added / property edited) |
| Purpose | Capture a decision in the moment | Apply a rule every time, no click needed |
| Example | Approver clicks Approve | When Status → Submitted, auto-tag the approver |
| Runs | Only when someone acts | Automatically, every time |
Use a button for the decision itself (a human is choosing). Use an automation for everything that should follow predictably from that decision.
Step 4 — Use database automations to move stages on their own
Database automations fire when a trigger condition is met and then run actions — no click required. For a broader primer, see the Notion automation guide.
| Triggers | Actions |
|---|---|
| Page added | Edit property |
| Property edited (with Status/Select value matching) | Add page to (another database) |
| Edit pages in (a related database) | |
| Send Slack notification |
Trigger recipes
Practical automations for an approval database:
- On submit — Trigger: Property edited, Status is
Submitted. Action: Edit property → set Approver, stamp Submitted date withNow. - Auto-route — Trigger: Status is
Submitted. Action: Edit property to tag the next approver (or send a Slack notification to them). - On changes requested — Trigger: Status is
Changes Requested. Action: Notify the requester and clear the decision date.
With these three rules running, requests advance and notify the right person on their own, so nothing sits stuck just because someone forgot to update a status.
Guardrails: filter 'Edit pages in' actions
The Edit pages in action edits rows in a related database. Without a filter it can edit every related row at once.
⚠️ Always scope "Edit pages in" with a filter (e.g. only rows where Stage = current, or Status = In Review). An unfiltered bulk-edit action is the fastest way to overwrite the wrong records across a whole database.
Filtered views to work the queue
Automations move Status; saved views are how each person actually works the queue day to day. On the approval database, set up a handful of role-based filtered views: Inbox (Status is Submitted, Approver = me), Waiting on Me (Approver = me, Status is In Review), Overdue (Decide-by date is before today, Status is not Approved/Rejected), and My Submissions (Requester = me). Four views, one database — every requester and approver gets a personal queue without duplicating a single row.
Step 5 — Build multi-stage / sequential sign-off
This is where most guides stop at "you can do manager → HR" without ever showing it. Here is the actual repeatable pattern.
The repeatable pattern: an Approval-stage property that advances
Instead of adding a Status value per approver, add one "Approval stage" Select property that advances through the chain — for example Legal → Finance → Exec. Each stage gets its own button + automation pair:
- Add a Select property Approval stage with values
Legal,Finance,Exec,Complete. - For each stage, add an Approve button that: sets
Decided by= person who clicked, stampsDecided at=Now, and (via its action) advances Approval stage to the next value. - Add an automation per stage: Trigger: Approval stage is
Finance→ Action: tag the Finance approver and notify them. Repeat for each value. - When the final stage's button fires, set Status = Approved and Approval stage =
Complete.
The result is a single chain you configure once. Adding or reordering approvers means editing the Select values and their paired automations — not rebuilding the database.
| Stage | Button advances to | Automation notifies |
|---|---|---|
| Legal | Finance | Finance approver |
| Finance | Exec | Exec approver |
| Exec | Complete → Status Approved | Requester |
When one flat database is enough vs. splitting into Approval Steps
| Situation | Structure |
|---|---|
| 2–3 sequential approvers, you only need the current stage and final outcome | One database + Approval-stage property |
| Long chains, or you must retain each stage's decision, decider, and timestamp | Split into a separate Approval Steps database (one row per stage) |
For a two-step manager → HR leave approval, the flat pattern is plenty. For a procurement chain where auditors later ask "who signed off at the finance stage on March 3rd?", you want the dedicated log below.
Step 6 — Keep an audit trail
Auto-stamping who decided and when
The button configuration from Step 3 is the audit-trail mechanism, reframed: every decision button that runs Edit property (Decided by = person who clicked) + Edit property (Decided at = Now) writes an immutable-in-practice record of who decided and when, automatically. No separate "log this decision" step for a human to forget.
A dedicated Approval Steps log
For multi-stage chains, capture each stage — not just the final state — in a separate Approval Steps database:
- Create an Approval Steps database with fields: Related request (relation), Stage, Decision, Decided by (Person), Decided at (Date).
- On each stage's Approve/Reject button, add an "Add page to" action that creates a new Approval Steps row and stamps Stage, Decision, Decided by (
Person who clicked), and Decided at (Now). - Roll the steps back to the request with a relation, so any request shows its full decision history.
A fully approved request then carries a readable trail — "Legal approved by A on the 1st, Finance by B on the 2nd, Exec by C on the 3rd" — rather than a single final flag.
What this guide deliberately leaves out — reminder cadence and escalation
This article is scoped to building the workflow. It does not cover the separate problem of getting people to act on it: when to send the first nudge, how to remind before and after a decide-by date, and how to escalate an overdue request. That cadence is a workflow of its own and is covered end to end in Notion approval reminders. Scoping build and cadence into separate pieces lets each go deeper instead of covering both thinly.
The real limitation: approvers who aren't in Notion

Buttons and automations require the approver to open the page
Everything above shares one hard dependency: the approver has to open the Notion page to click the button. Database automations can tag and notify, but they cannot make an outside decision for someone. That is fine when every approver is an active Notion user. It breaks for the audience approvals most often depend on:
- Clients approving creative, quotes, or scope
- Vendors and contractors confirming terms
- Guests invited to one page
- Rarely-active staff — an exec or finance lead who lives in email, not Notion
For these people, "share access" is not a real answer. A guest still has to receive the link, remember to open it, navigate to the row, and click. Most won't — and the request stalls at "In Review" with nothing native left to do.
When you do grant access, follow least-privilege sharing: invite an external approver to the single page for their request, not the whole database — that keeps every other request, and every other person's data, out of their view. It is the right default for guest access, but it still doesn't solve the core problem above: the approver has to open that page and click.
How Kapsel closes the gap — a one-click decision with no Notion account
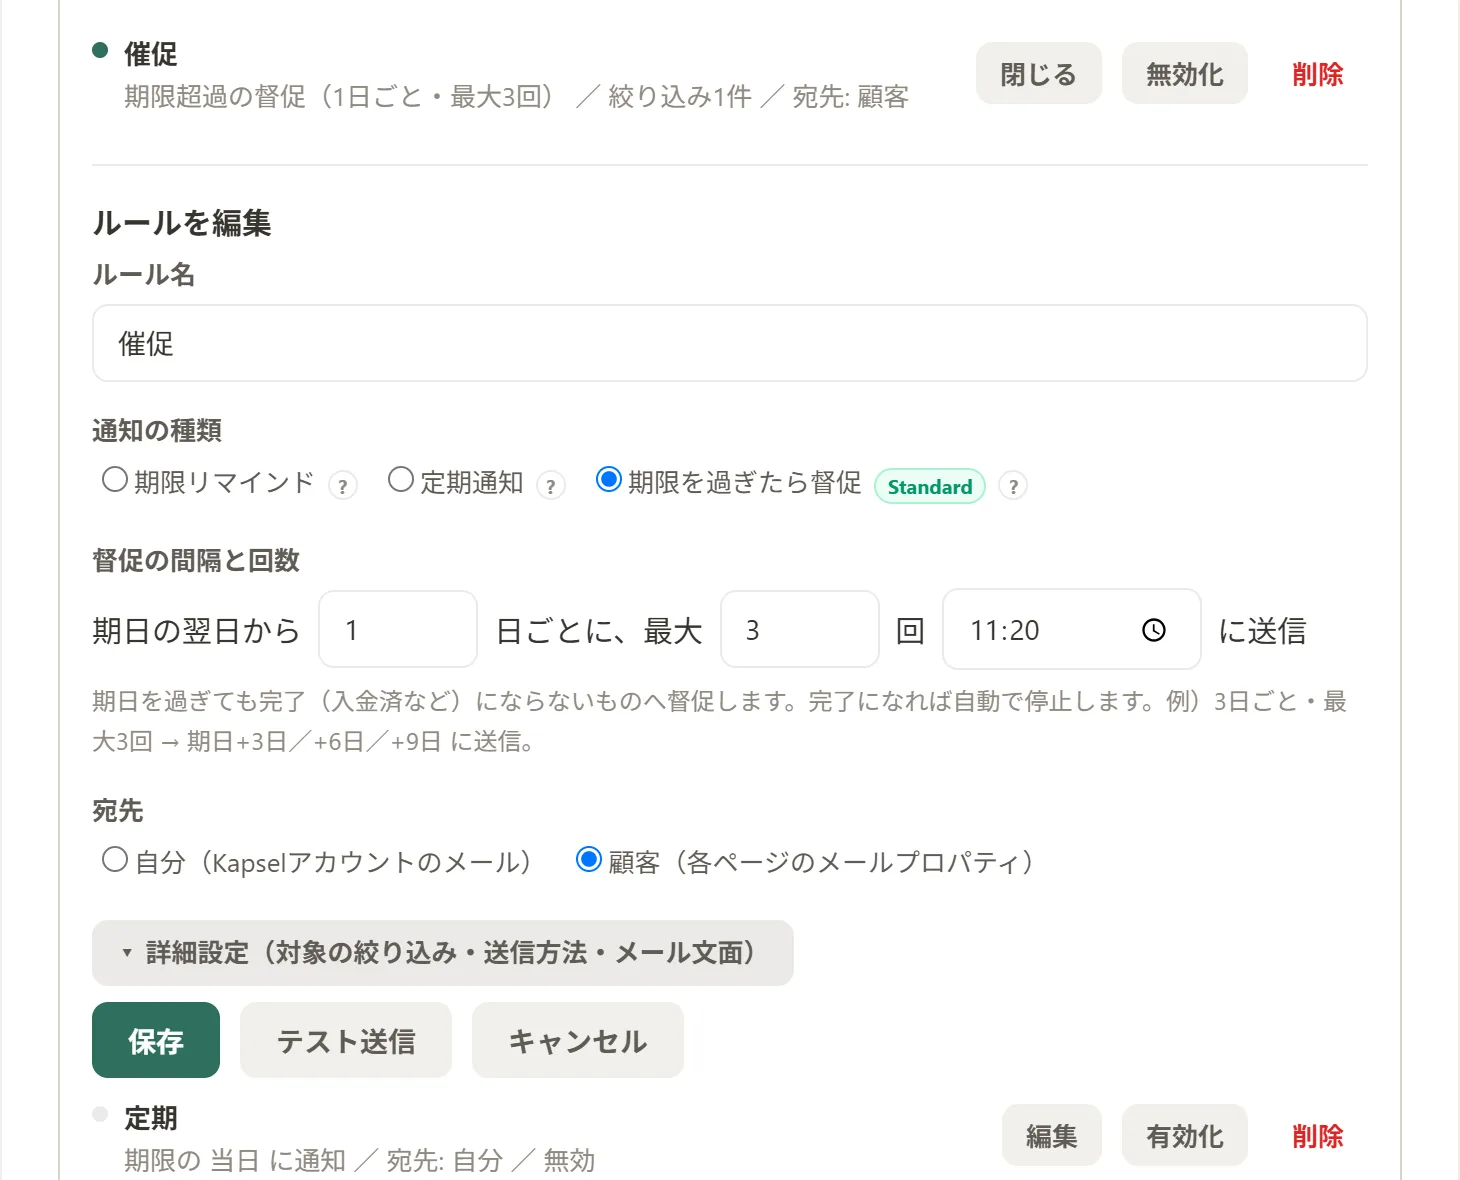
Kapsel is a tool that watches your Notion database's due dates, assignees, and status and emails the right person an automatic reminder — including people who don't use Notion at all. For an approval build, that means the approver gets an email (no account, no login), clicks Approve or Reject directly in it, and the decision writes straight back to the Notion Status property on the request. Kapsel never sends to items already marked Completed or Paid, and audience filtering lets you exclude rows already at Approved or Rejected — no reminder chases a decision that already landed.
| Native Notion buttons/automations | Kapsel |
|---|---|
| Approver must open the Notion page | Decision happens in an email |
| Requires a Notion account or guest access | No Notion account required |
| No native external notification | Automatic email to the approver |
| Manual chasing when it stalls | Reminder until a decision, filtered to exclude completed/paid items |
This is the external-reach angle explored further in Notion email reminders and, for the client-facing case specifically, keeping clients updated from Notion.
Setting this up with Kapsel (what's actually built today)
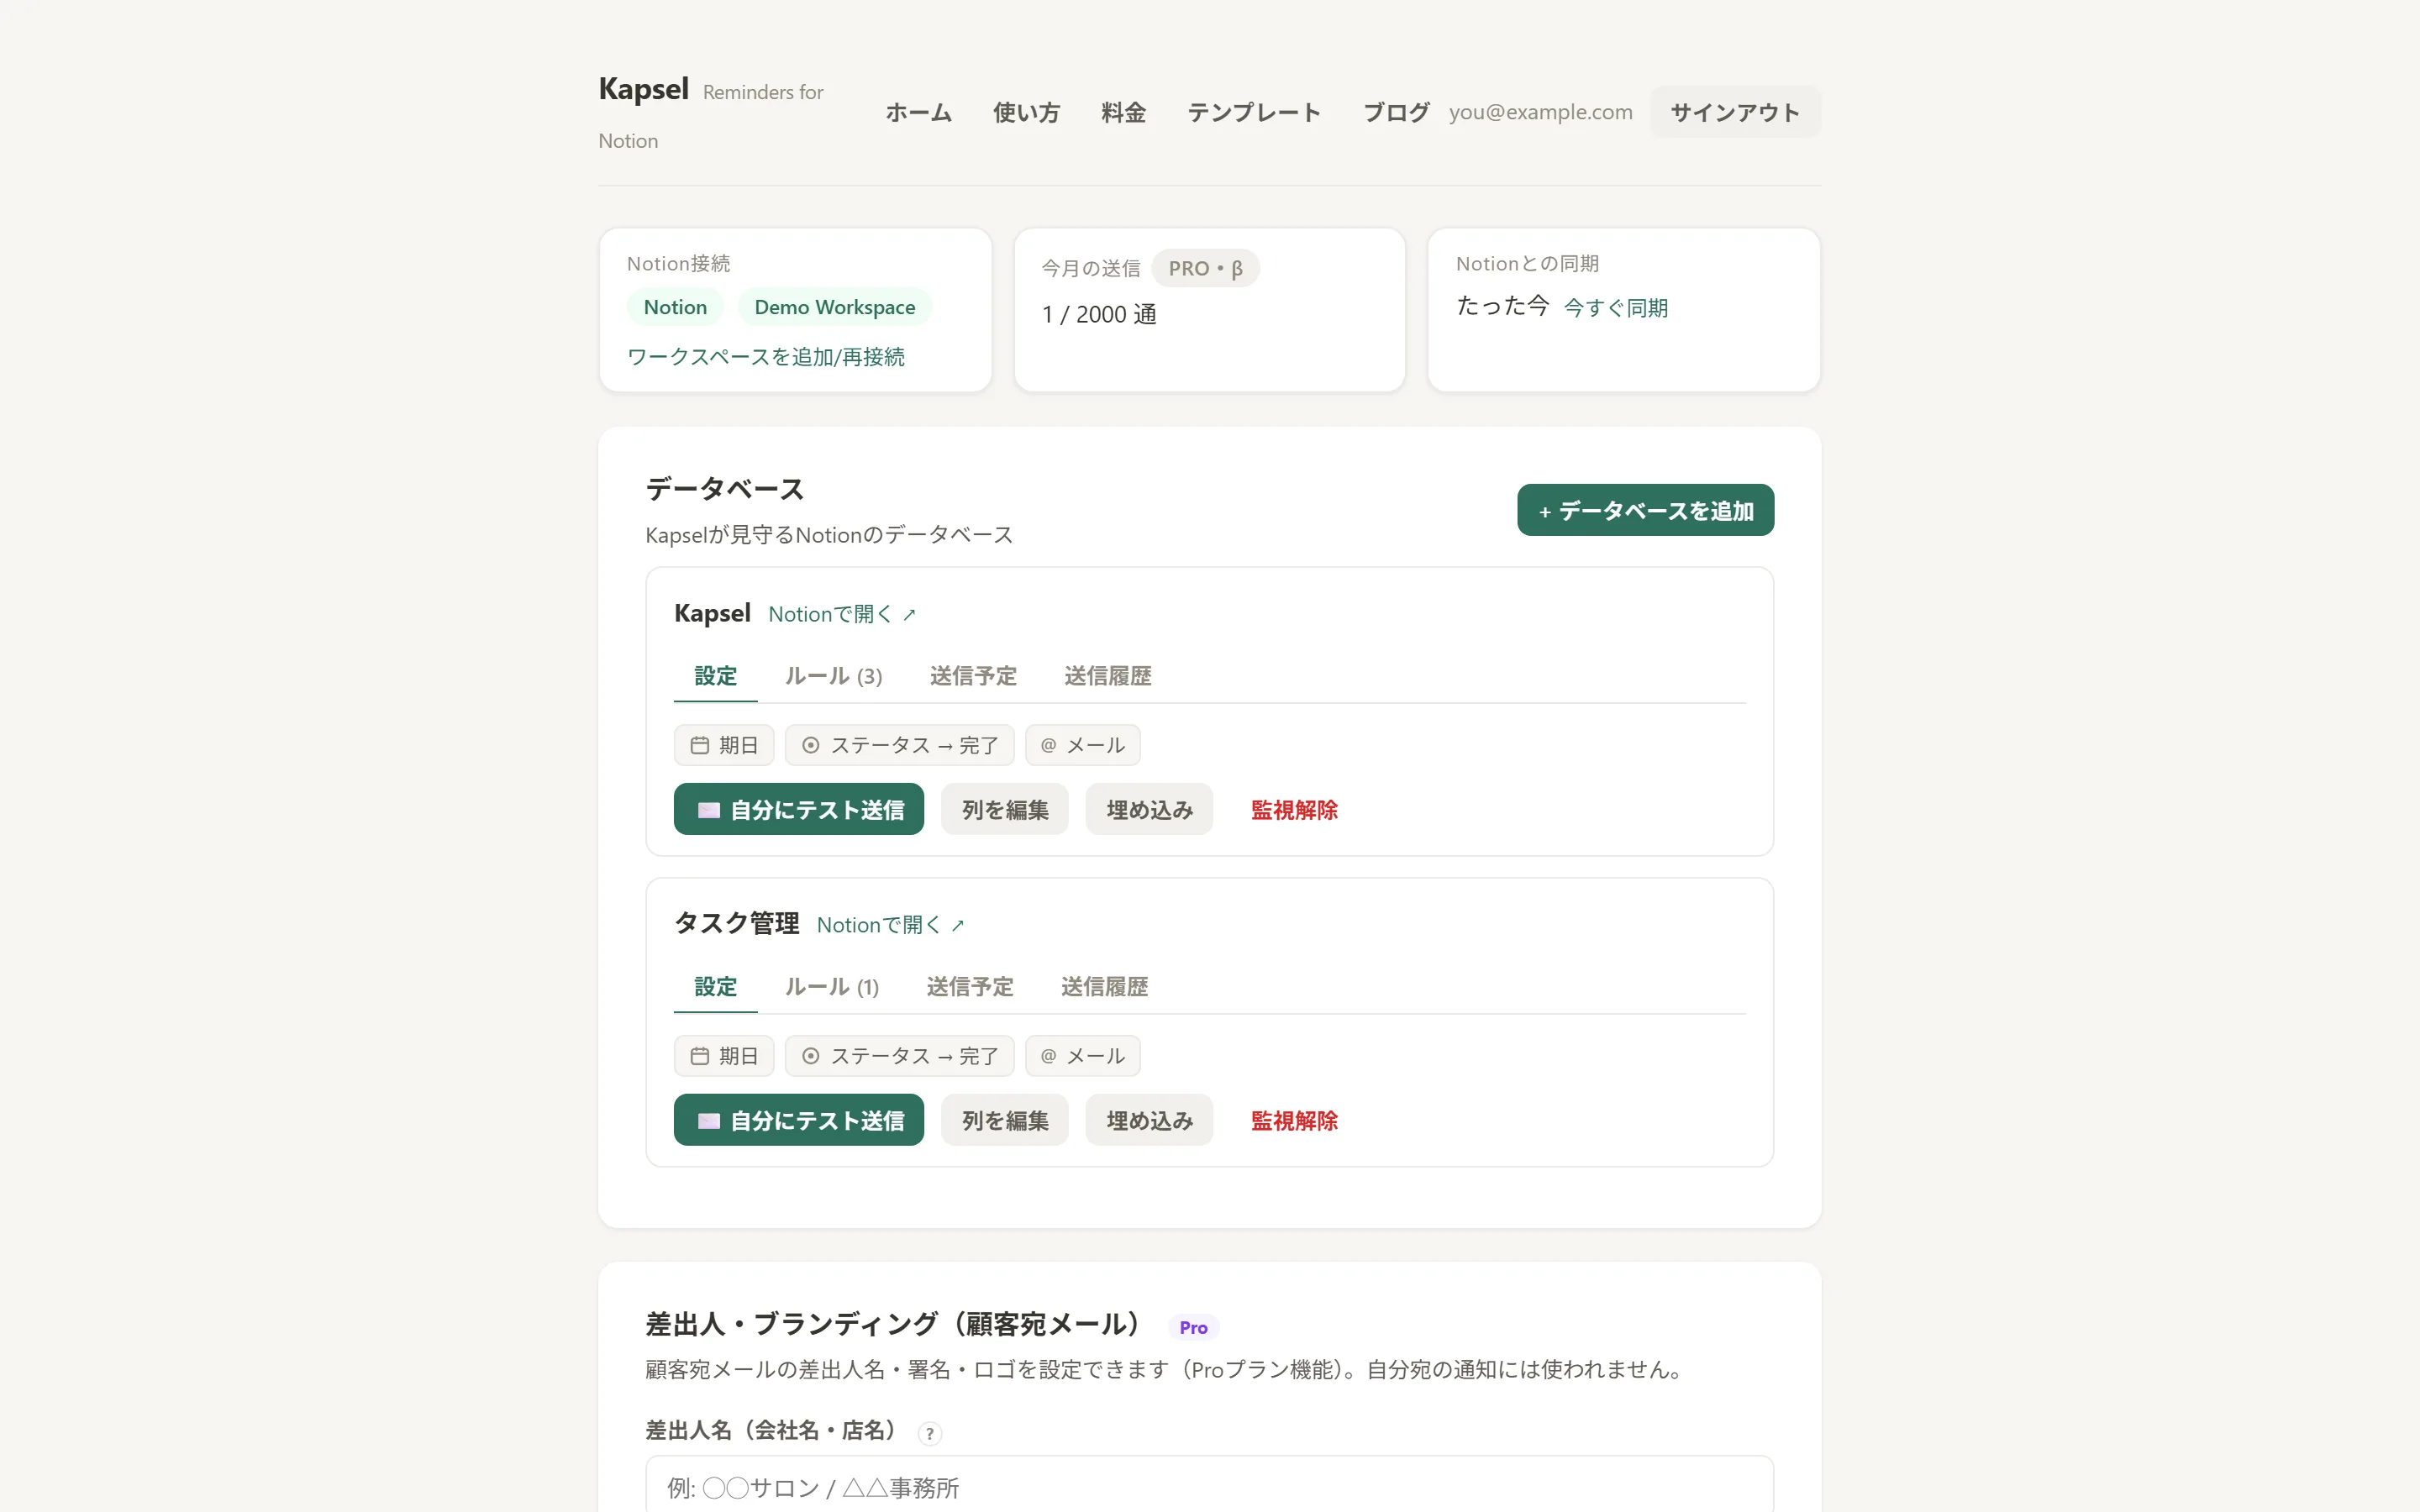
To route an approval decision to someone outside Notion with the workflow you built above:
- Connect Kapsel to the approval database you designed in Step 1.
- Point it at your decide-by date and choose the recipient (the Approver field or an external email).
- Filter to the stage that needs action — e.g. only rows where Status is
In Review— so nothing goes out on completed items. - Kapsel emails that approver, captures their one-click Approve/Reject, writes it back to your Status property; use audience filtering so it never re-sends to rows already Approved, Rejected, or otherwise completed.
Kapsel's free plan is ¥0 / $0; paid plans are Standard ¥1,980 / $12 and Pro ¥4,980 / $29 (Pro adds multiple workspaces and sender branding). Check the official pricing page for exact, current figures. Kapsel handles the reach-and-capture layer; the database, stages, buttons, and audit trail you build in Notion stay the system of record. It contrasts cleanly with plain task nudges — see Notion team task reminders for where reminders end and decision routing begins.
Frequently Asked Questions
How do I create an approval workflow in Notion? Build a dedicated database with one row per request (Item, Requester, Approver, Status, Submitted date, Decide-by date, and a link to the item under review). Add a small Status taxonomy (Draft → Submitted → In Review → Approved / Rejected / Changes Requested), Approve/Reject buttons to capture the decision, and database automations to move stages automatically. That combination is a complete approval workflow.
How do I add an Approve/Reject button in Notion?
In the database, click the slider (Properties) icon, choose New property → Button, and label it Approve or Reject. Open Edit automation and add the actions it should run — typically set Status, stamp a date with Now, and record the person who clicked. Save, and the button appears on every row.
What's the difference between Notion database buttons and database automations? A button runs when a human clicks it, so it is for decisions someone makes in the moment. A database automation runs by itself whenever a trigger condition is met (a page is added, or a property is edited to a specific value), so it is for rules that should apply every time without a click. Use buttons for the approval decision and automations for the consequences that follow.
What Status properties should an approval database in Notion have? Keep it to roughly 5–8 stages: Draft, Submitted / In Review, Approved, Rejected, and Changes Requested cover most workflows. Give each stage an explicit entry and exit condition. Resist adding a status per approver — that is status bloat; track who is next in a separate Approval-stage property instead.
How do I set up multi-step or sequential approvals in Notion?
Add one Select property called Approval stage with values like Legal → Finance → Exec → Complete. Give each stage a button that records the decider and timestamp and advances the property to the next value, plus an automation per stage that tags and notifies the next approver. This configures the whole chain once, rather than rebuilding per approver.
Can a Notion button automatically move a status and record who approved it?
Yes. A single button can run several actions at once: set the Status property (e.g. to Approved), stamp a date property with Now, and record "Person who clicked the button" as the decider. One click produces an "approved by X at Y" record with no manual entry.
How do I keep an audit trail of approvals in Notion?
For a simple flow, the button actions that stamp Decided-by (person who clicked) and Decided-at (Now) are themselves the audit trail. For multi-stage chains, add a separate Approval Steps database and have each stage's button create a new step row via "Add page to", so you retain every stage's decision, decider, and timestamp — not just the final outcome.
Can someone approve a Notion request without a Notion account? Not with native buttons or automations — those require the approver to open the Notion page, which means a Notion account or guest access. A tool like Kapsel sends the approver an email with one-click Approve/Reject and writes the result back to the Notion Status property, so the person deciding never needs a Notion account.
How do I stop notifying someone once a Notion item is approved or rejected? In native automations, add a condition so notifications only fire while Status is a non-terminal stage (e.g. In Review). For external email reminders, Kapsel never sends to items already marked Completed or Paid, and audience filtering lets you exclude rows already at Approved or Rejected, so no reminder chases a decision that already landed.
Is Notion good enough for approval workflows, or do I need a separate approval tool? For internal teams where every approver actively uses Notion, native databases, buttons, and automations handle approvals well and keep everything in one place. The gap appears when a decision must reach clients, vendors, guests, or rarely-active staff who won't open Notion — there you add a layer (such as Kapsel) that emails them and writes the decision back, rather than replacing Notion.
Notes & sources
- Published 2026-08-27.
- Primary sources referenced: Notion's official help documentation on databases, the Status property, database Buttons, and database Automations (triggers and actions). Feature names and behaviors reflect Notion's documented functionality as of writing.
- Kapsel feature and pricing details are current as of the publish date; refer to the official Kapsel pricing page for exact, up-to-date figures. Pricing shown: Free ¥0 / $0, Standard ¥1,980 / $12, Pro ¥4,980 / $29 (tax included for JP).